
Still deciding? See what Live Streaming in Continuum Learn can do for your organisation.
An event is a live broadcast with its own watch page. You set it up once under Create > Events: add a schedule, choose where the video comes from, decide who can watch and for how long, then go live. When the stream ends, the recording becomes the replay, ready to watch on demand. (To sell recordings on their own, see selling webinar recordings.)
Events are separate from courses. Learners find them on their own watch page, not inside a course.
Who can do this: team admins and authors can create and run events under Create > Events. Streaming itself needs to be switched on for your platform. If a session says streaming isn't configured, contact support.
Before you start
- Decide the format: a single live session, or a multi-session event (for example a conference over several days).
- Have your poster image ready. A trailer video is optional.
- If you want to charge, decide your access options (live only, replay only, or both) and prices. Selling needs payments to be connected for your team. If you're not sure, contact support.
- Streams are delivered to viewers in HD, up to 720p. Send your best quality from your encoder; viewers get the rendition that suits their connection.
Create an event
- Go to Create > Events and click New Event.
- Choose Live Event (a scheduled broadcast with a replay) or On Demand (pre-recorded videos only, no live stream).
- Type a Title and click Create Event. The event opens on its Details tab.
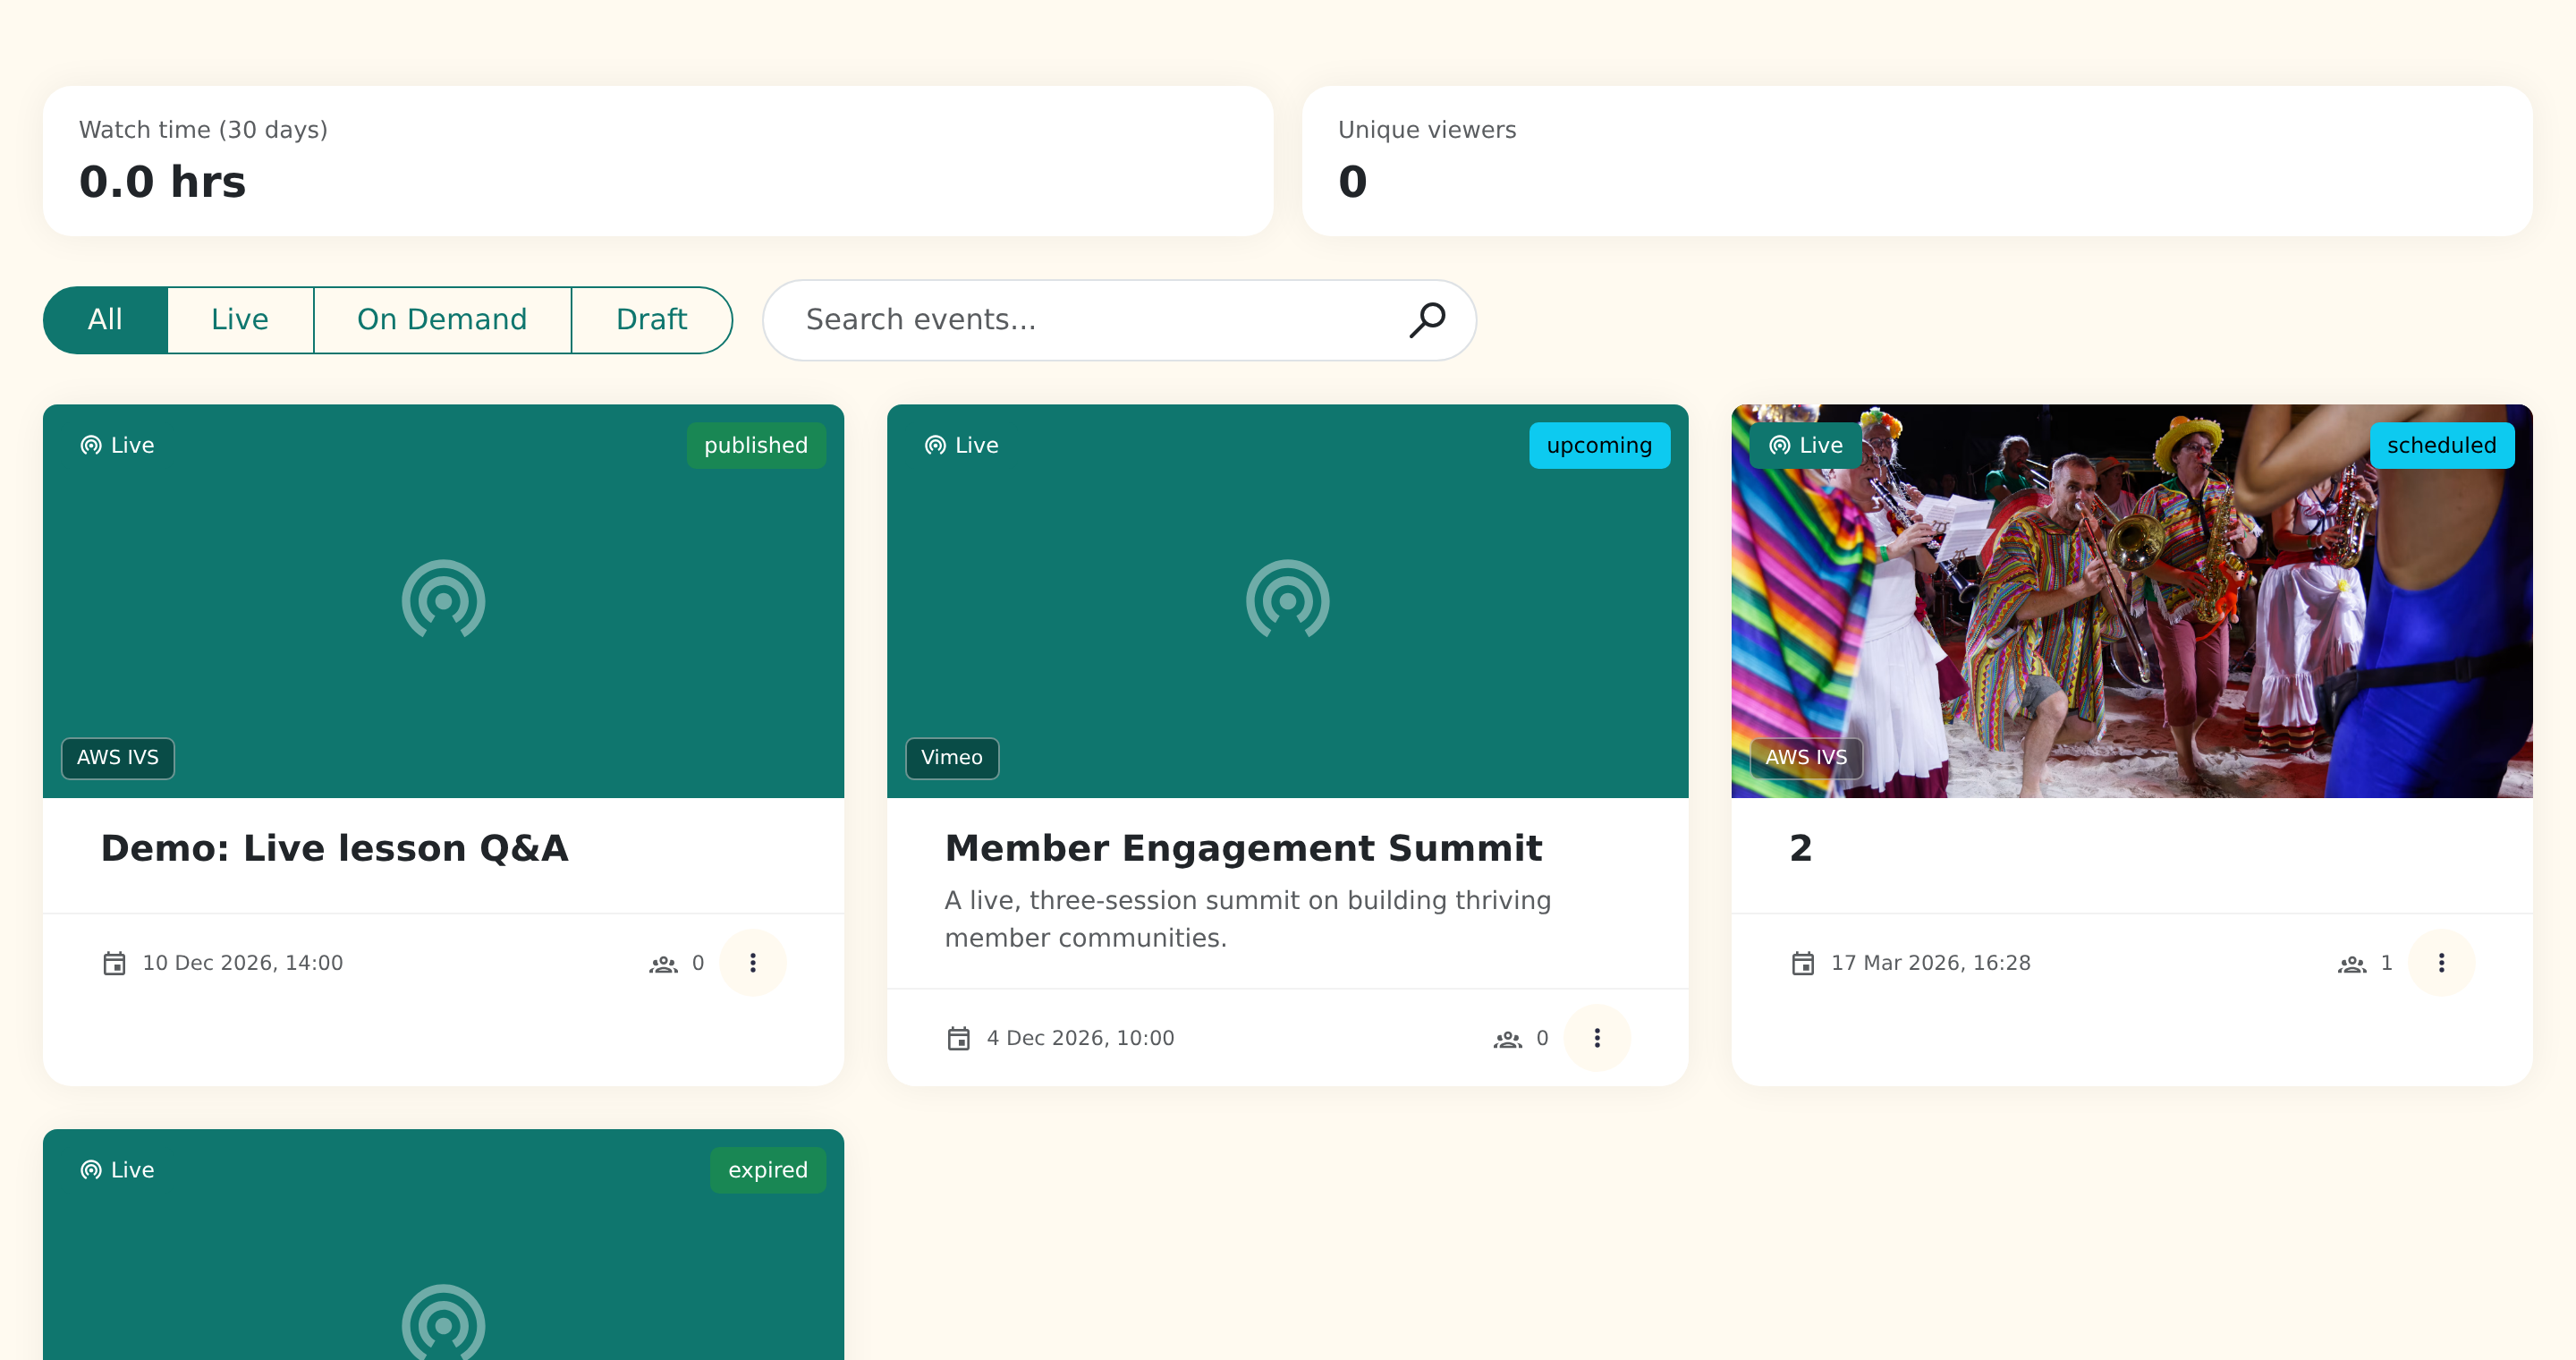
The list shows each event's type, status, date and viewer count. Use the filters (All, Live, On Demand, Draft) or the search box to find one. The top of the page summarises watch time and unique viewers over the last 30 days.
Add the details
On the Details tab:
| Card | What to fill in |
|---|---|
| Details | Title, Short Description (shown on cards) and Description (shown on the watch page). |
| Schedule | Start Date & Time and End Date & Time for a single session, plus the Timezone. For several sessions, use Manage Sessions (see below). |
| Media | Poster Image (upload it with Upload Image) and an optional Preview Video / Trailer (Upload Video). You can also add a Portrait Video, shown to viewers whose screen is in portrait orientation. |
Click Save Changes when you're done.
Choose the page layout
The Page Layout card on the right sets how the watch page looks. Pick one and the preview updates as you go.
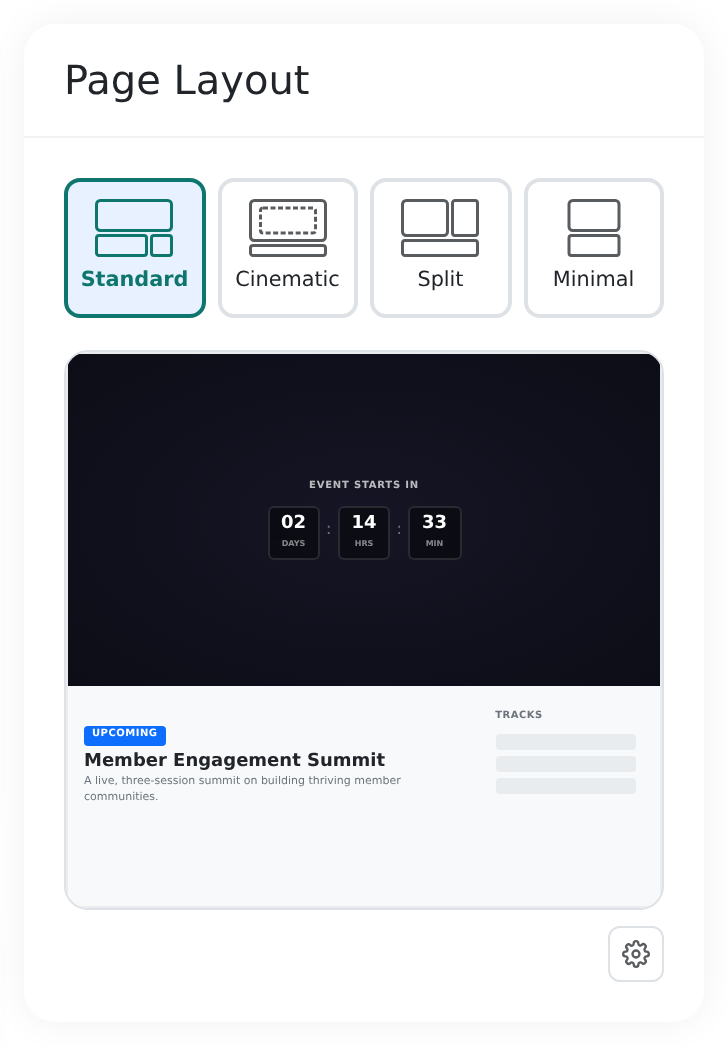
| Layout | Best for |
|---|---|
| Standard | The default: a wide player with event details beside the description. |
| Cinematic | A full-width, dark, theatre-style player. |
| Split | Player on one side, details on the other. |
| Minimal | A simple centred page with the player and description. |
Click the cog under the preview to simulate how the page looks when the event is upcoming, live or in replay, and for a viewer who Has Access, has No Access, or is a Guest.
Build the programme with sessions
Every live event has one or more sessions. Open the Sessions tab to plan them. Each session shows on the watch page as part of the programme.
- Click Add Session.
- Open the session and fill in the Session Title (optional), for example "Day 1 - Workshops", plus Start Date & Time and End Date & Time.
- Choose the Streaming source (see the next section).
- Drag the handle on the left to reorder sessions.
- Click Save Changes.
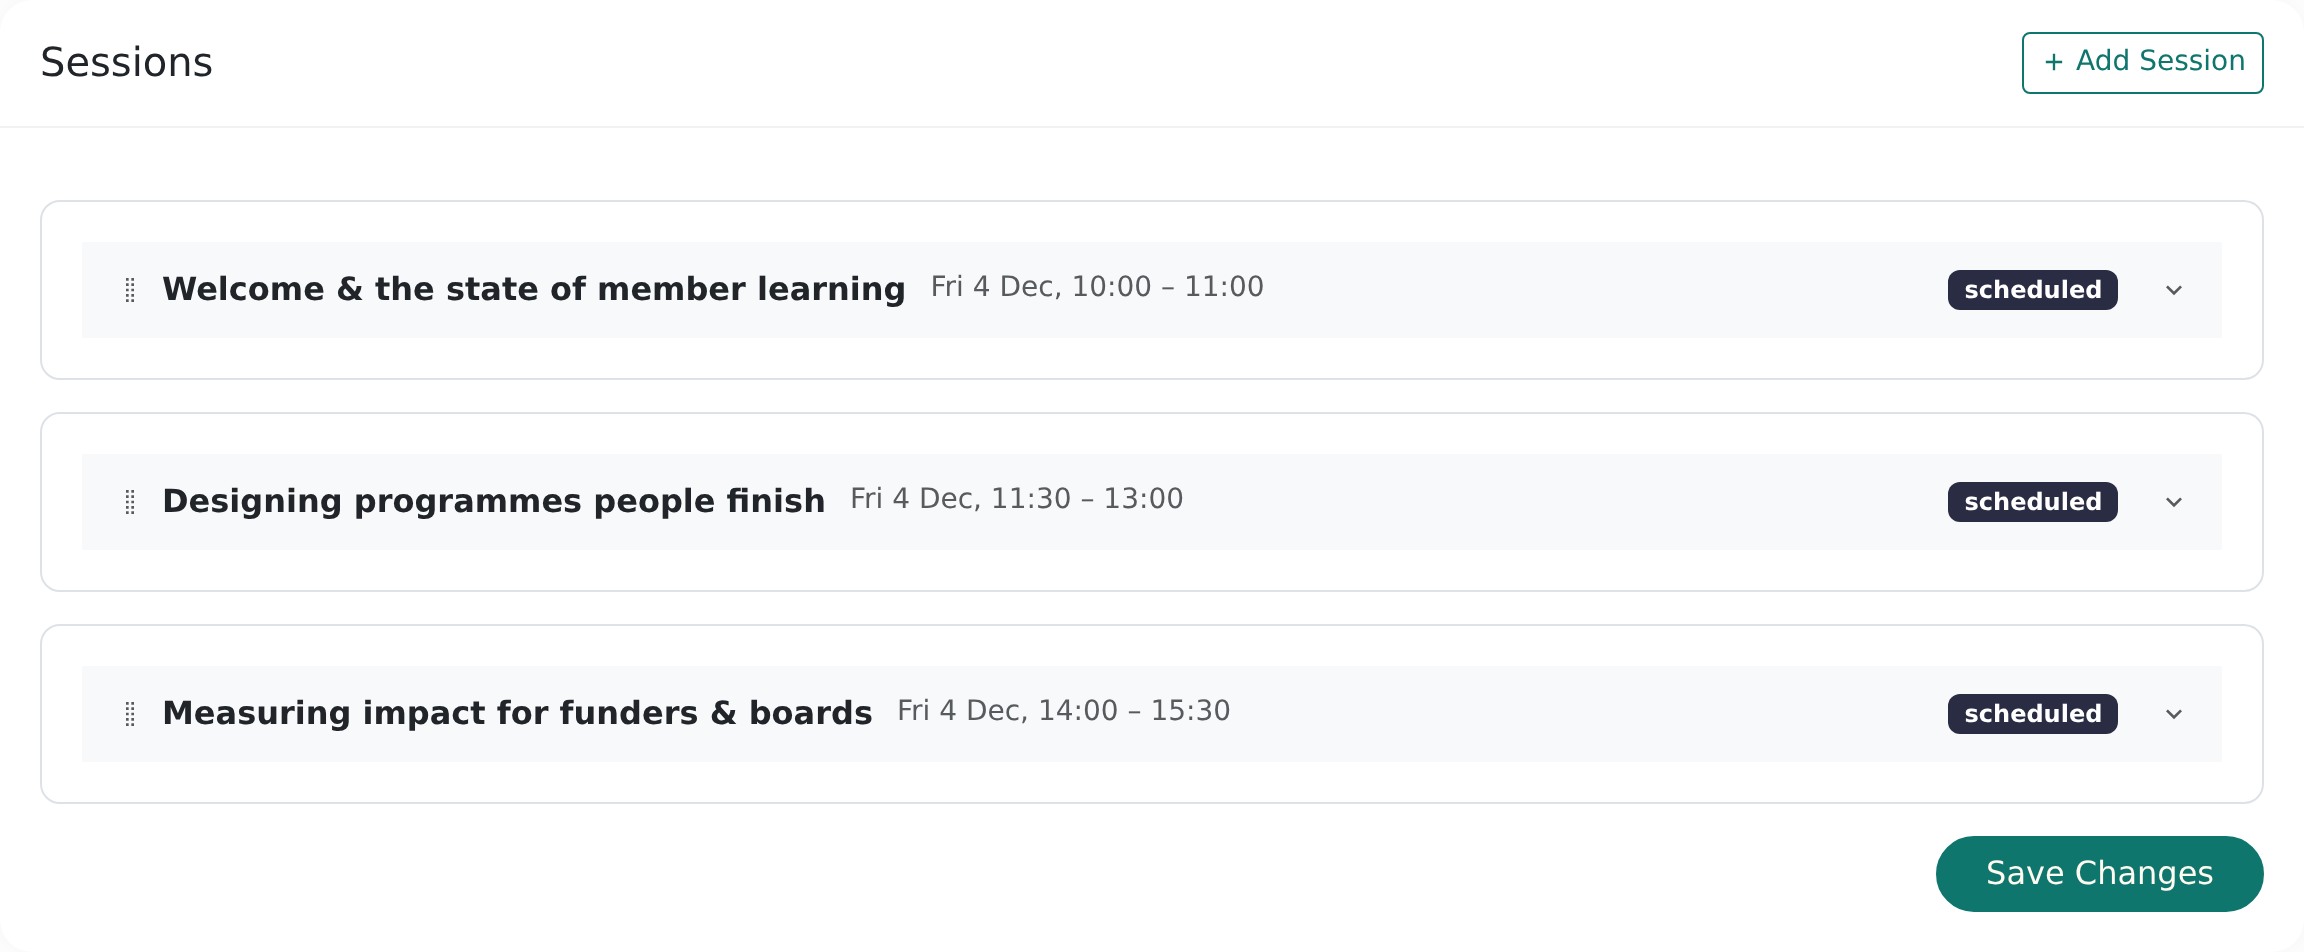
Each session has its own Status. Leave it on Auto (use schedule) and it is live during its time window and ended afterwards. Choose Scheduled, Live, Ended or Cancelled only if you need to override that.
If two sessions are live at once, viewers see a chooser so they can pick a room and switch between them.
Choose where the video comes from
Each session has its own Streaming source:
| Source | What it is |
|---|---|
| AWS IVS | A stream channel managed by Continuum. You send video to it from OBS or from your browser. This is the option with built-in recording, so the replay appears automatically. |
| Cloudflare Stream | Paste a Cloudflare Stream embed URL, or create a managed live input on the Stream tab. |
| Vimeo | Paste a Vimeo embed URL (the player.vimeo.com/video/… form). No stream channel is needed. |
Depending on your plan and setup, some sources may not be available. If a session says AWS IVS isn't configured, contact support.
Set up your stream
Open the Stream tab. Each session has its own card.
- Click Create Stream Channel on the session. This only needs doing once per session.
- Choose a Broadcast Method: OBS / External or Browser Studio.
Stream with OBS or other encoder software
- On the Stream tab, choose OBS / External.
- Copy the RTMPS Server URL and the Stream Key. Click Show to reveal the key.
- In OBS Studio, go to Settings > Stream. Set Service to Custom, paste the server URL into Server and the key into Stream Key, then click Apply.
- Click Start Streaming in OBS. The event goes live automatically.
Treat the stream key like a password. If it leaks, click Reset Stream Key and update your encoder.
Stream from your browser
- Choose Browser Studio.
- Click Allow Camera & Microphone and pick your Camera and Microphone.
- Choose a Layout: Camera Only, Screen Only or Camera & Screen. You can also share your screen and mute your microphone.
- Click Go Live. Click End Broadcast when you finish.
Test before the event
Click See Preview on the Stream tab to watch what viewers will see, and Check Stream Status to see whether the channel is LIVE or Offline, along with its health and viewer count. Stream a few minutes from your encoder the day before to check your audio, picture and connection.
Publish, go live and end
The status buttons at the top of the event page (draft, scheduled, live, ended, cancelled) control what viewers see.
- Keep the event on draft while you build it.
- Switch it to scheduled when it's ready to be announced. Click Preview to open the watch page in a new tab.
- Start streaming. The stream goes live automatically when your encoder connects, and the event shows as live.
- When you stop streaming, the stream ends automatically. Once all sessions are done, the event as a whole ends.
If something goes wrong, the Stream tab has Force Live and Force End buttons. They are manual overrides for when the automatic switch doesn't happen. You won't normally need them.
Charge for access
Open the Pricing tab and click Add Product. Each product is one option viewers can buy.
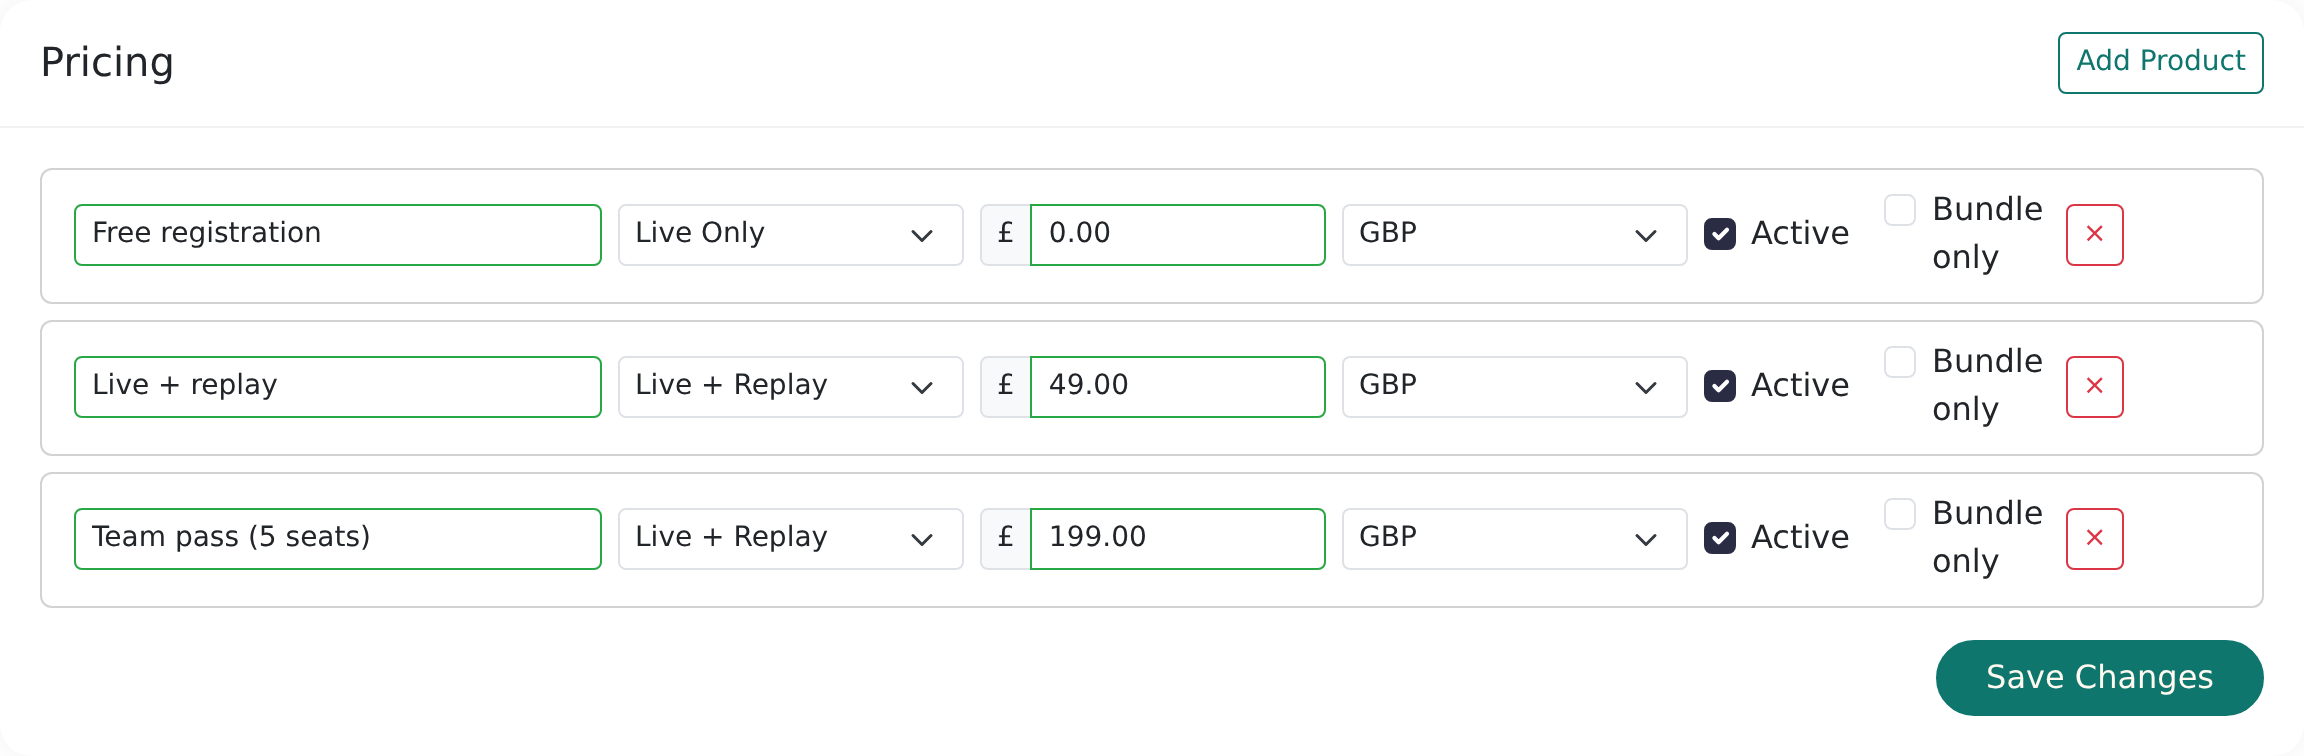
| Setting | What it does |
|---|---|
| Product name | What viewers see, for example "Live + replay". |
| Access type | Live Only, Replay Only or Live + Replay. On demand events only offer Full Access. |
| Price and currency | In GBP, USD or EUR. A price of 0.00 makes it free. |
| Active | Untick to hide the option without deleting it. |
| Bundle only | Only sold as part of a bundle, not on its own. |
Click Save Changes to apply your changes. If a bundle includes the event, it's listed under Included in Bundles.
If an event has no active products at all, it is treated as free: viewers see Free Event and a Sign Up button.
How long access lasts
- Live access works while the event is on.
- Replay access lasts until the replay window closes, which is the number of days you set after the last session ends, or the same number of days from the moment someone buys, whichever is later. A late buyer therefore always gets a full window.
- If Enable replay is switched off for the event, access doesn't expire.
Give someone access manually
On the Access tab, search for a person under Grant Access, pick the Access Type (Live + Replay, Live Only, Replay Only) and grant it. The table shows who has access, where it came from, when it was granted and when it expires. You can remove access from the same table.
Admins and authors can always open the watch page to check it, without buying.
Chat and questions
Open the Engagement tab.
- Enable live chat: viewers can post messages while the event is live.
- Enable Q&A: viewers can submit questions that you can answer.
Click Save Changes, then use the Messages list below, or Open moderation page to keep it open on a second screen while you present. Filter by All, Chat, Questions or Hidden. For each message you can:
- Pin or Unpin it, so it stays visible;
- Hide or Unhide it, which removes it from viewers' view but keeps it for your records;
- Delete it;
- Answer a question. The answer you publish is shown to viewers alongside it.
Viewers see chat open when the event goes live.
Replays
Automatic recordings
When an IVS stream ends, the recording is added to the event automatically as the replay. Open the Replay tab to see it. It may show a processing status for a short time first, and viewers see "Replay processing" until it is ready.
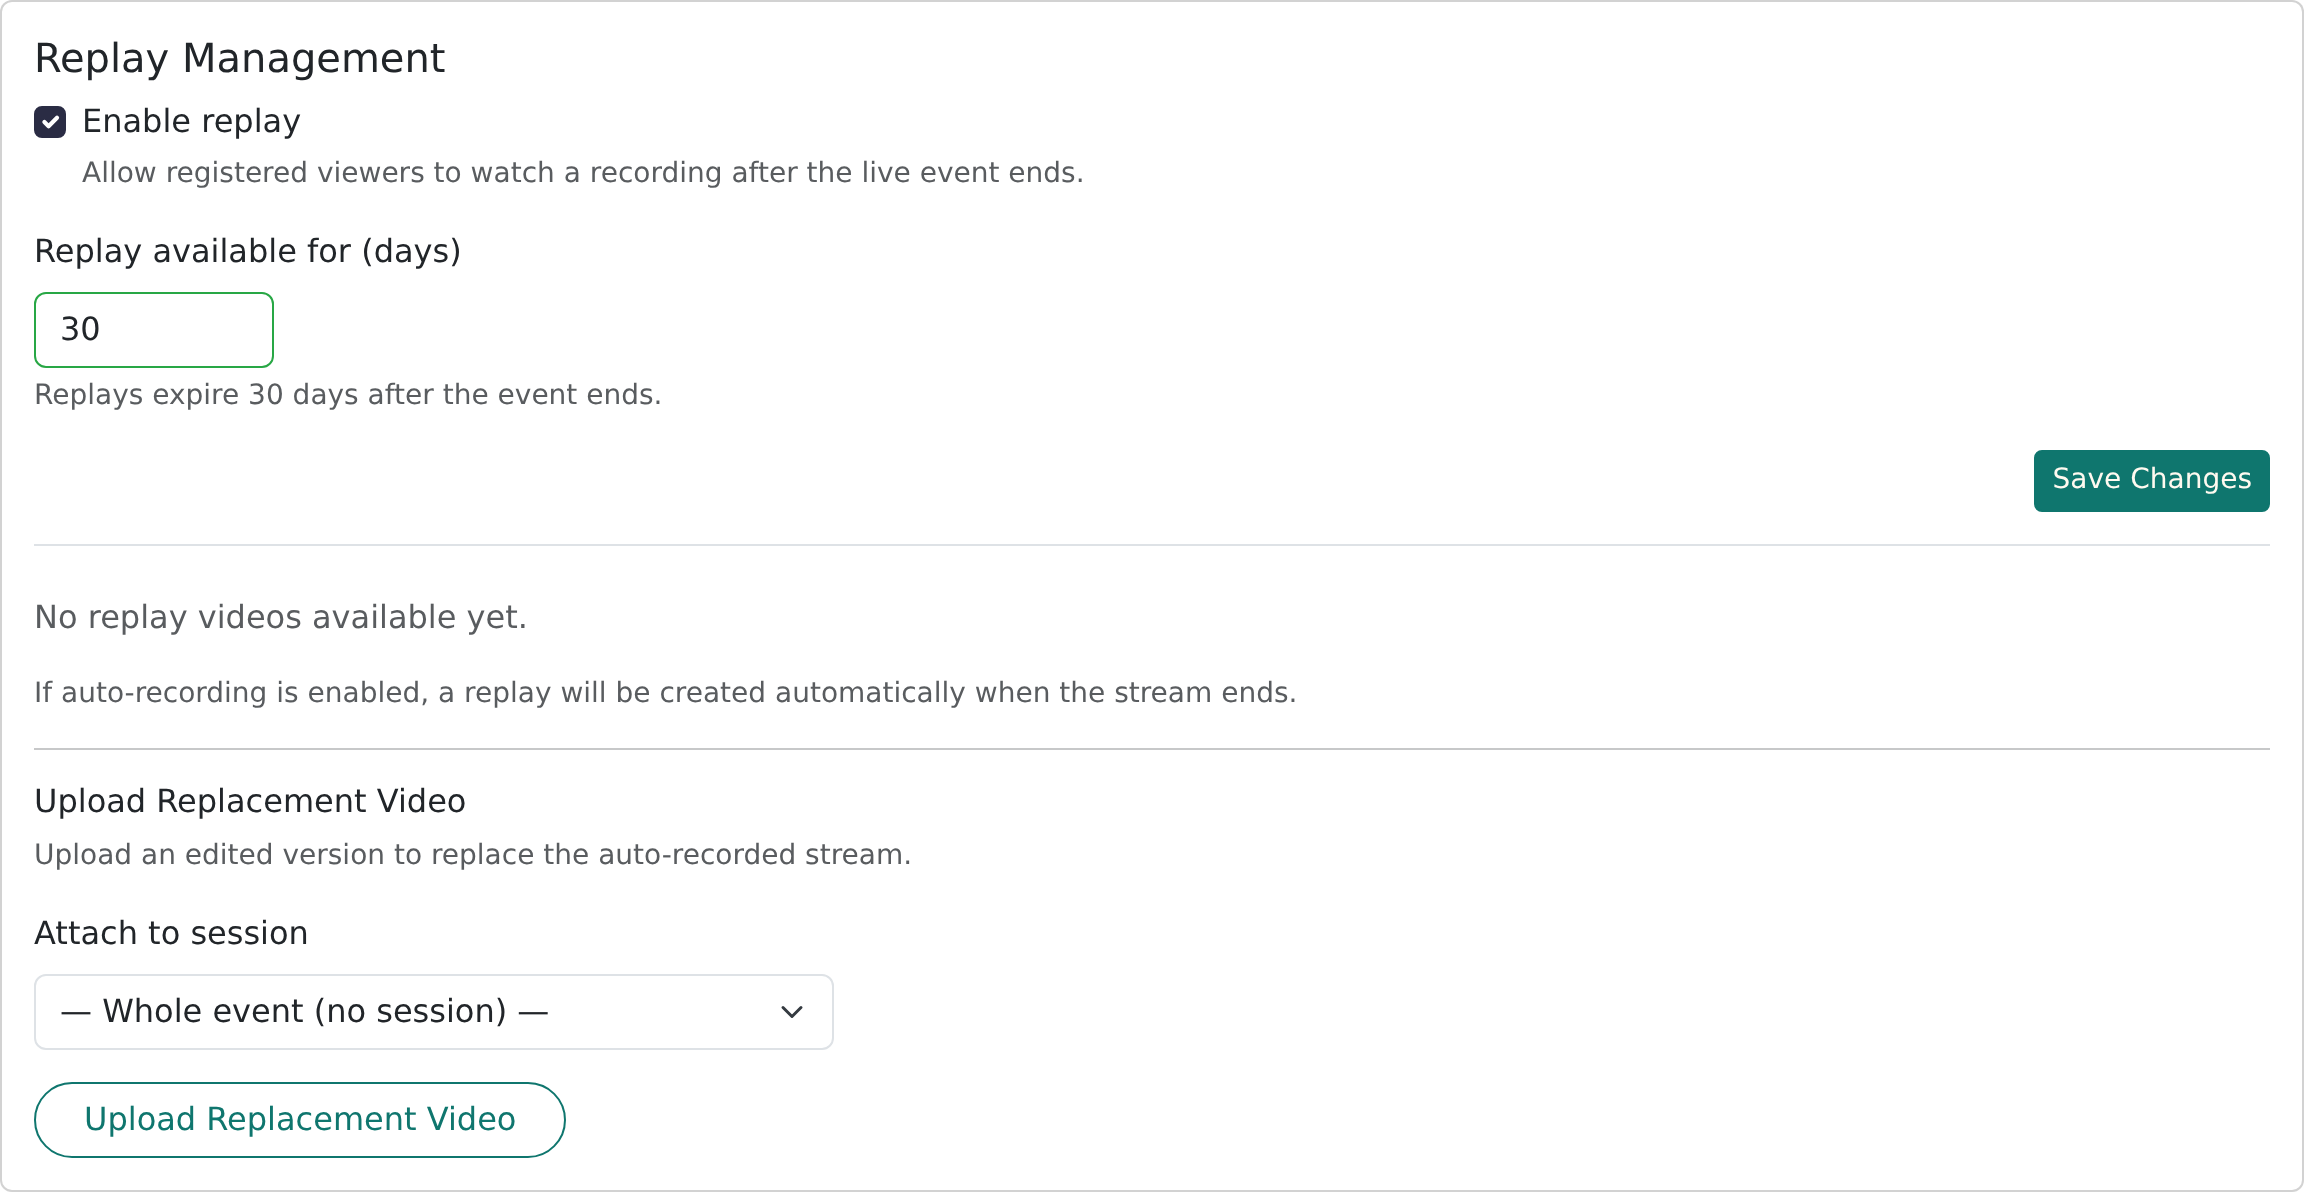
On the Replay tab:
- Tick Enable replay to let viewers watch the recording after the event. Untick it if you don't want a replay.
- Set Replay available for (days). The default is 30 days.
- Click Save Changes.
For a multi-session event, each session has its own recording, grouped by session.
Replace the recording
To swap in an edited version:
- On the Replay tab, choose Attach to session, or leave it as Whole event (no session).
- Click Upload Replacement Video and pick the file. Keep the tab open until it finishes.
- When it is ready, click Preview to check it, then Set as active. The active replay carries an Active badge.
- Remove the old recording with Remove if you no longer need it.
Where a replay is hosted with captions support, use Captions to upload a VTT file or auto-generate captions in a language.
Chapters
On the Chapter Lists tab, click Add Track and give it a Title, an optional Artist / Performer and a timestamp (such as 12:30). Choose the Session first if the event has several. Viewers use the chapter list to jump to key moments in the replay. Chapters only appear on the watch page while someone is watching a replay.
Supporting videos (on demand events)
On demand events have a Videos tab instead. Upload the Main Video, then add Supporting Videos such as slides walkthroughs or extras. Tick Free on a supporting video to let anyone play it without buying.
What viewers see
Viewers open the event's watch page.
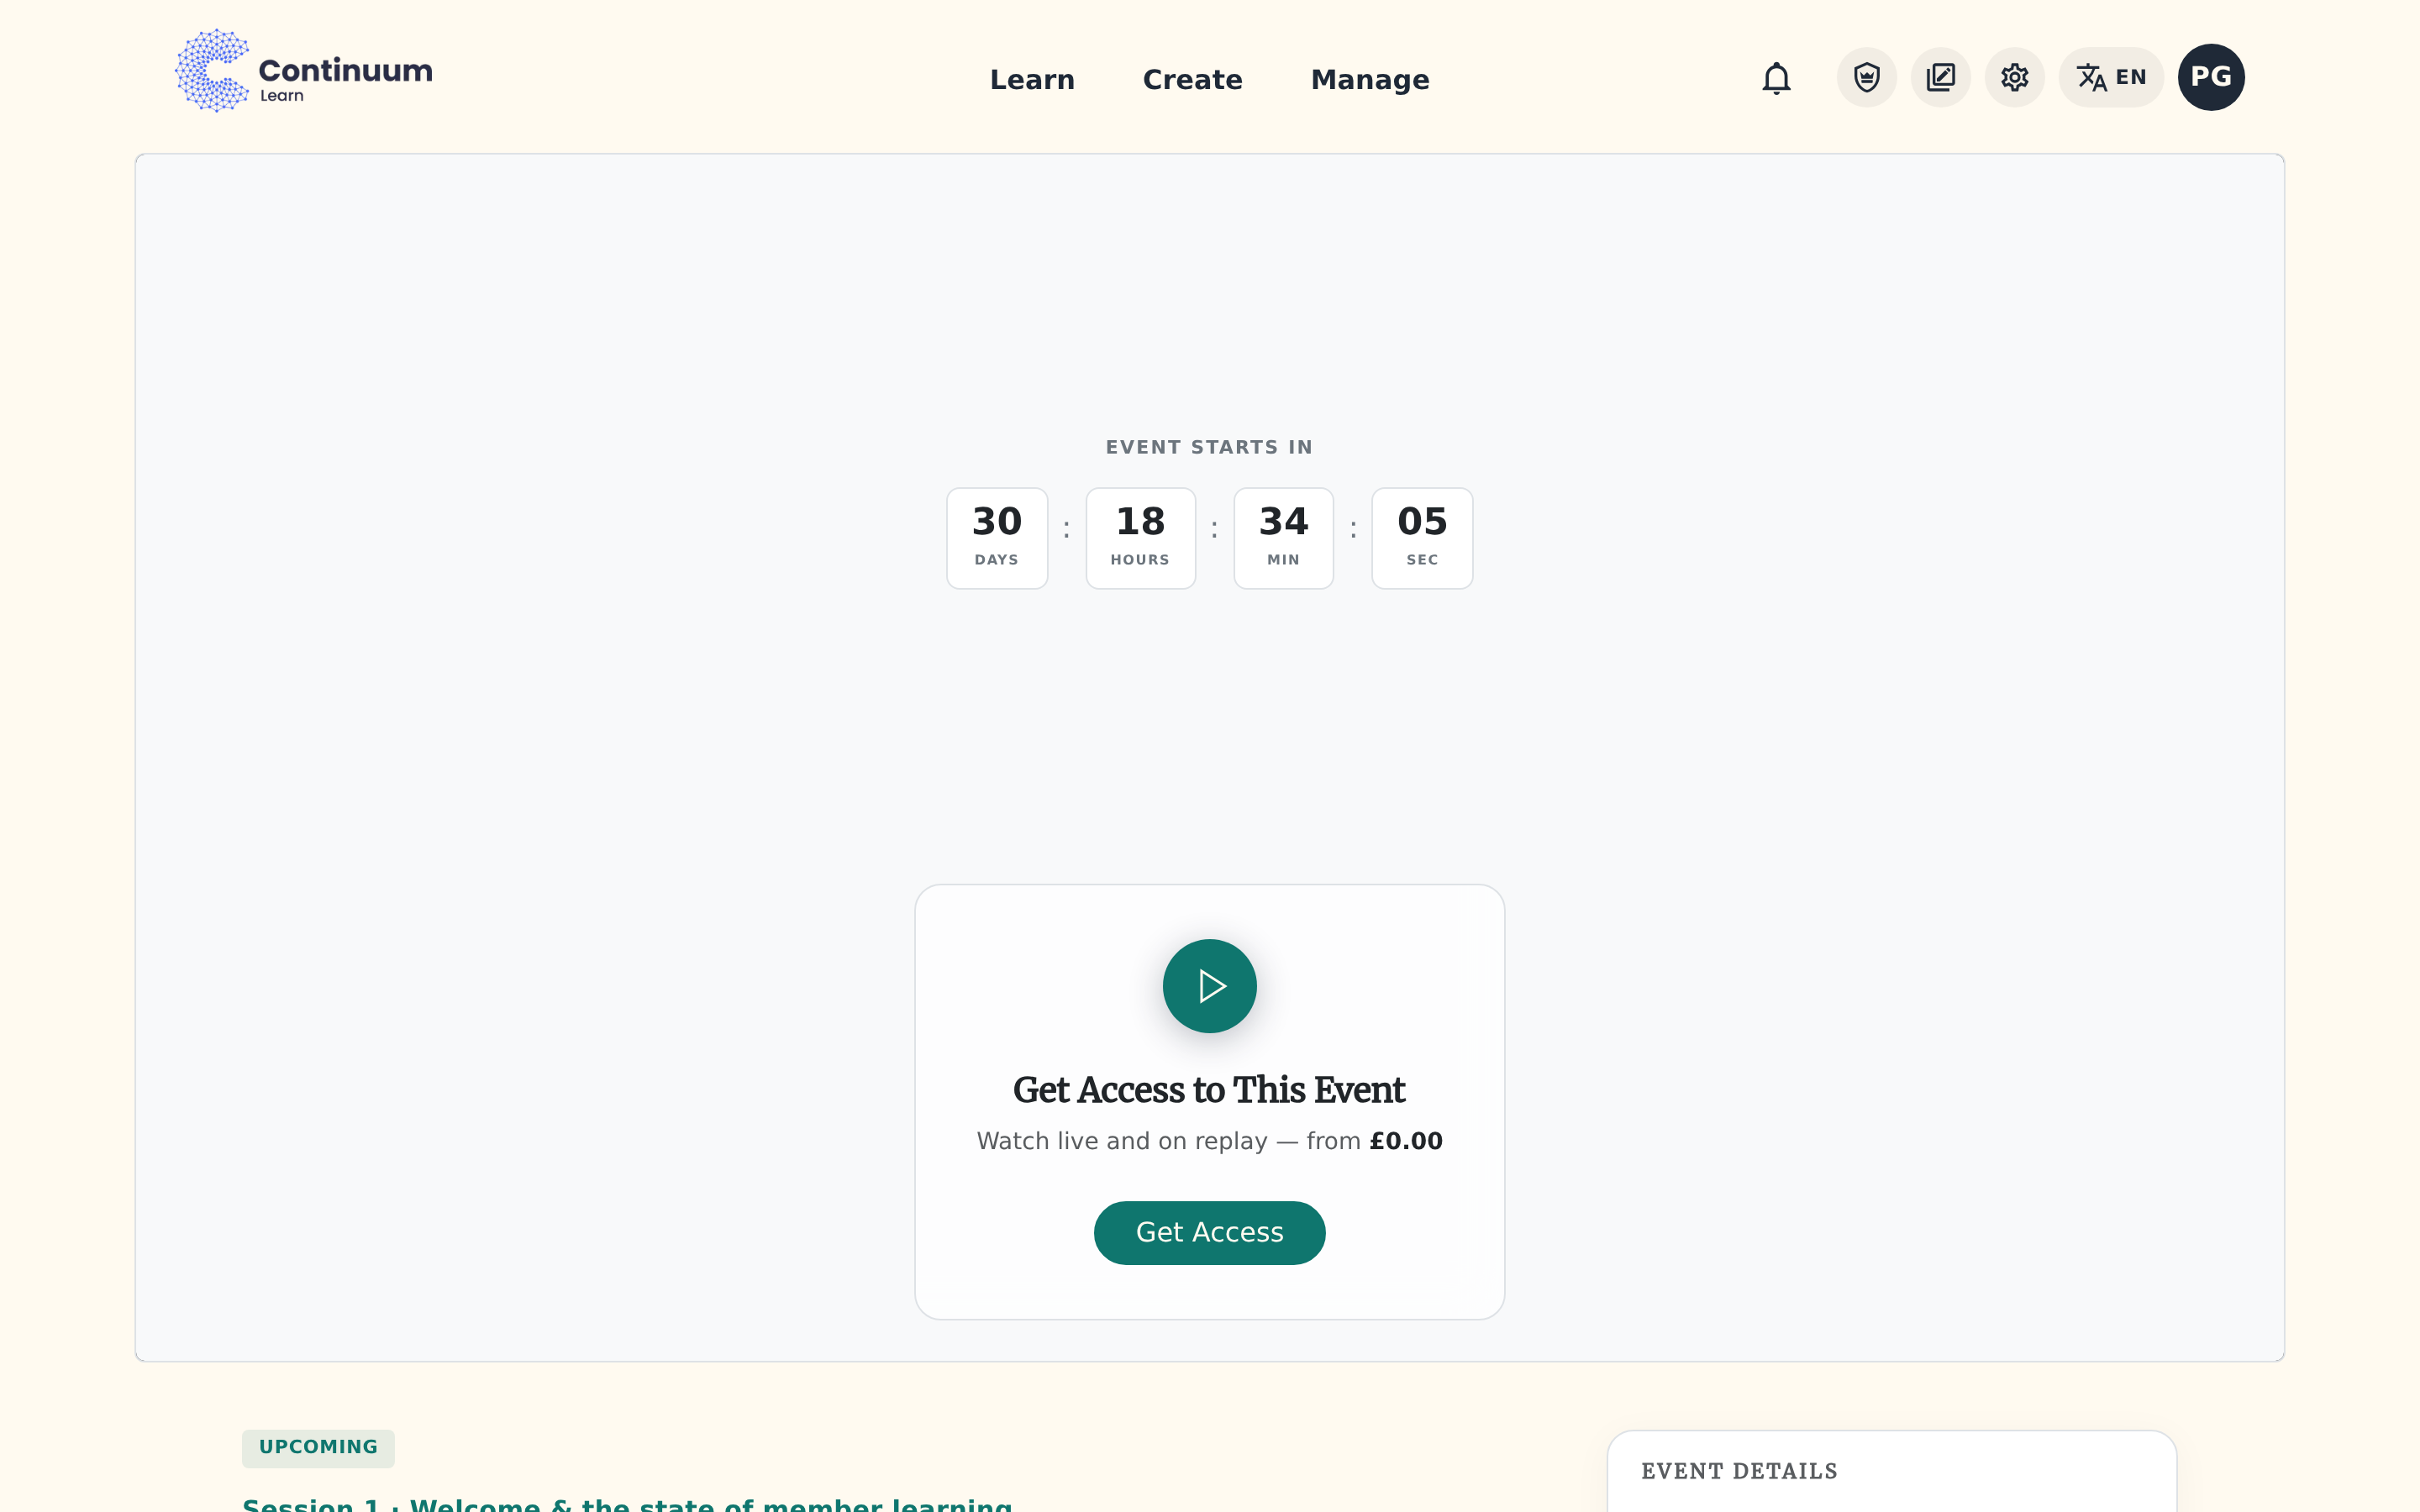
- Before the event, they see a countdown, a status chip (Upcoming), the programme and an Event details panel with dates and format. Add to calendar downloads a calendar file.
- Without access, they see Get Access (or Sign Up for a free event). After buying, a strip confirms what they've unlocked, for example Full access unlocked, with the expiry date.
- While live, the player and chat appear, and the chip turns Live. Viewers can open a chooser if more than one room is live.
- After the event, the chip becomes Replay and the recording plays. When the replay window ends, they see that the replay is no longer available.
| Chip | Meaning |
|---|---|
| Live | Streaming now. |
| Upcoming | Not started yet. |
| Replay | Ended, recording available. |
| On Demand | An on demand event that's published. |
| Ended, Expired, Cancelled, Draft | Neutral grey chips for events that are over, withdrawn or not yet published. |
Analytics
The Analytics tab shows, for a date range you choose: Unique viewers, Watch time, Peak concurrent, Completions, Purchases and Revenue. Below are charts of viewers over time, live concurrency, daily watch time split between live and replay, device and source, and where viewers drop off in the replay. A Sales table breaks down each product, and a Viewers table (filterable by live or replay) shows who watched and for how long. The Events list also shows an all-event summary for the last 30 days.
Archive or delete an event
From the menu on an event card in Create > Events, choose Delete for an event nobody has access to. If people already have access, the option is Archive instead: the event is hidden and can be restored later.
Frequently asked questions
I've started streaming in OBS but the event doesn't show as live. What do I check?
Check that the Server and Stream Key in OBS match the Stream tab, and that the session's Streaming source is AWS IVS. Click Check Stream Status to see whether the channel is receiving video. If the key was reset, update OBS. If it still doesn't go live, use Force Live and contact support.
Where is my replay?
Recordings appear on the Replay tab shortly after the stream ends, and can take a while to process. Check that Enable replay is ticked. If your session uses Vimeo or a Cloudflare embed URL, there's no automatic recording, so upload the replay yourself.
Can I sell live access and replay access separately?
Yes. Add one product with Live Only, another with Replay Only, and optionally a Live + Replay product. Viewers choose when they click Get Access.
How long do viewers keep replay access?
For the number of days set in Replay available for (days), counted from the end of the event or from the purchase, whichever is later.
Can viewers watch for free?
Yes. Either give the event no active products, or add a product at 0.00. Free events ask viewers to sign up first.
Can I run an event without a live stream?
Yes. Create it as On Demand and upload videos on the Videos tab.