
In short
In Continuum Learn, you can invite people by email, let them sign up themselves with or without approval, require approval or limit places on a course, enrol people yourself, or assign groups to courses. This guide covers each route and what learners see.
There are four ways to get someone onto a course in Continuum, and you can mix them:
- Invite them by email. They get a link, set a password and join your team.
- Let them sign up themselves on your learning site, with or without your approval.
- Enrol them yourself, one course at a time.
- Put them in a group that has courses assigned to it.
Being in your team and being enrolled on a course are two different things. An invitation or a sign-up puts someone in your team. They are enrolled on a course only when they enrol themselves, you enrol them, or a group does it for them.
Who can do this: team admins, under Manage > People, Manage > Courses and Settings > Sign-up & security. Course authors set approval and places in the course settings.
Invite people by email
- Go to Manage > People > Invites and click Invite Users.
- Type an email address and click Add. Repeat for everyone you want to invite.
- For each person, choose their Role(s) (the default is learner) and, if you like, one or more Group(s).
- Click Add Users.
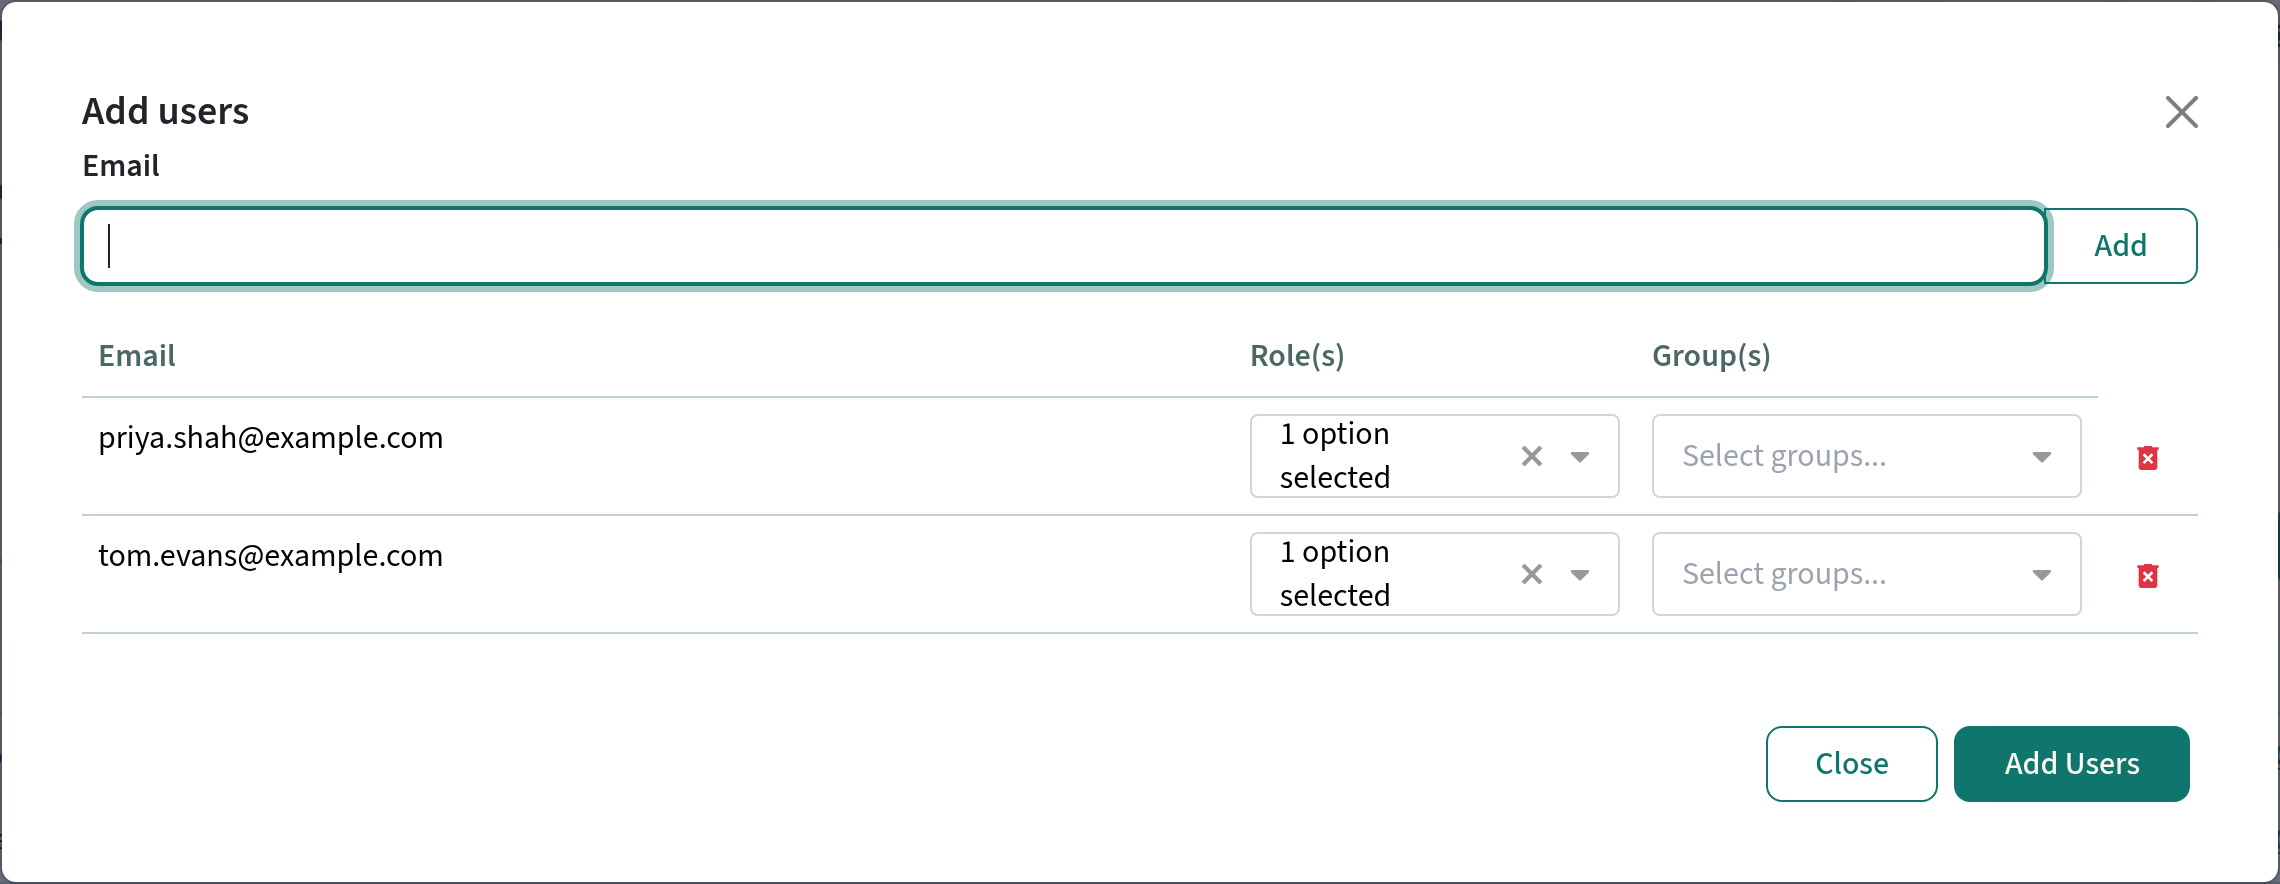
Each person gets an email called "You have been invited to join" followed by your team name, with a link to accept. Anyone who has not yet accepted appears on the Invites page with the date they were invited. Each row has three buttons:
| Button | What it does |
|---|---|
| Resend | Sends the invitation email again. |
| Copy Link | Copies the personal invitation link so you can send it yourself, for example in a chat message. |
| Delete | Withdraws the invitation. The link stops working. |
Things to know:
- Groups do the enrolling. If you pick a group and that group has courses set to Automatic, the person is enrolled in them as soon as they accept. See Groups and cohorts. An invitation with no group puts them in your team with no courses.
- Inviting the same address again replaces the earlier invitation, including its roles and groups. The earlier link stops working, so use the newest email or Copy Link.
- Roles. You can invite someone as a learner, author, admin or billing contact. Only give staff roles to people who need them.
- If the person already has a Continuum account (for example from another organisation), they are asked to sign in with it and are then added to your team. They don't need a second account.
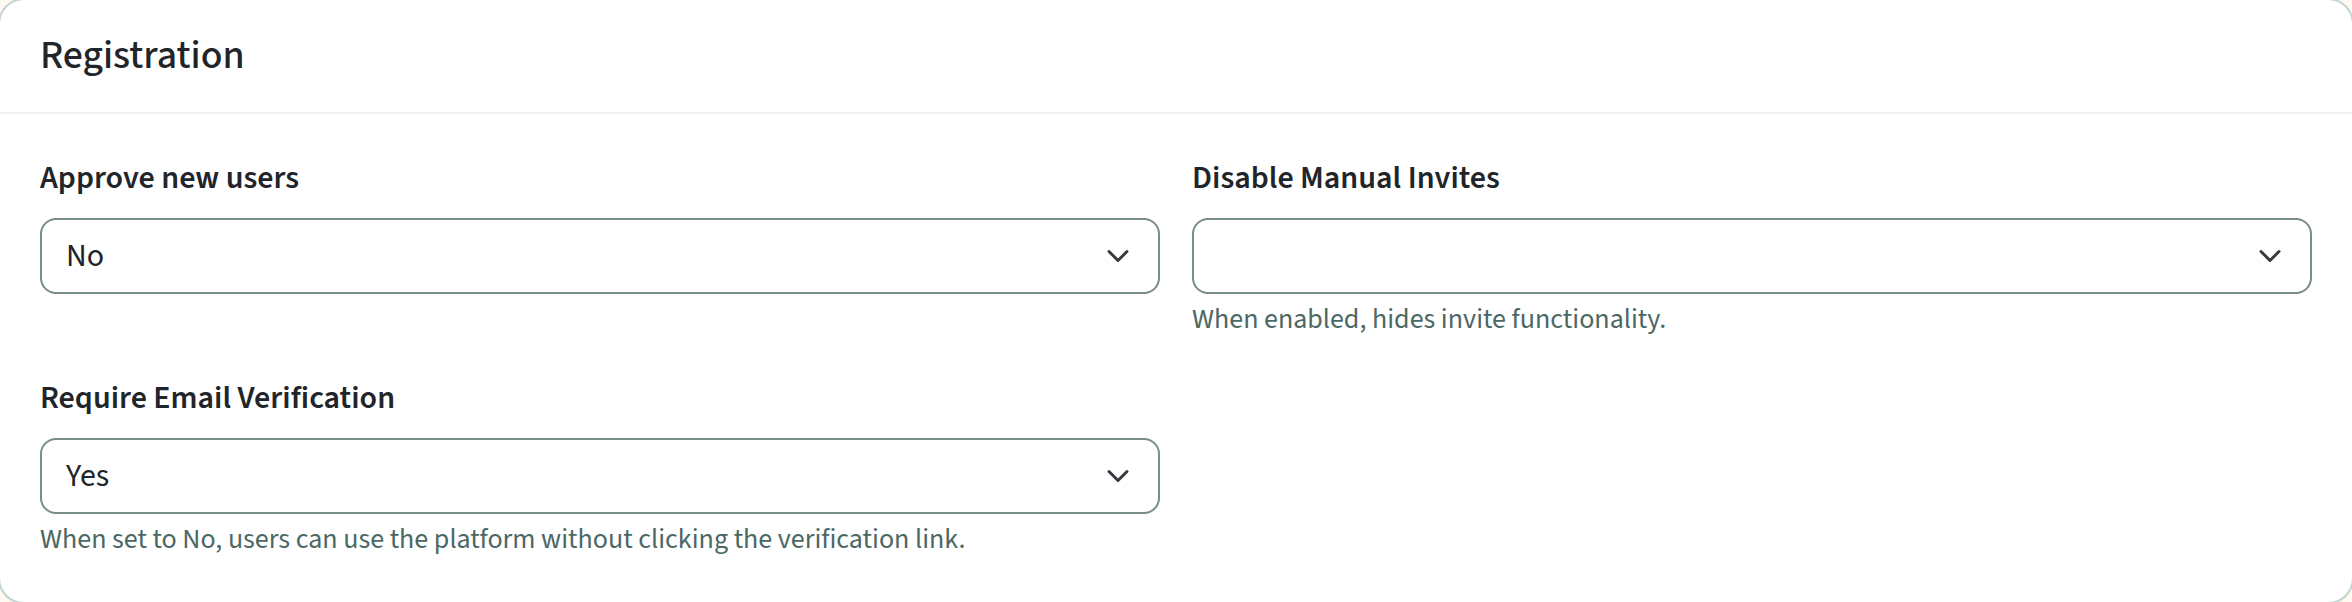
- If you don't see the Invites page, an admin has switched on Disable Manual Invites under Settings > Sign-up & security. Switch it off to use invitations.
What invited people see
- They open the link in the email. If they are new, they land on a page that already has their email address filled in, and they enter their name and a password and agree to the terms.
- Their email address counts as verified, because the invitation went to it, so they don't have to confirm it again.
- They are signed in and taken to your learning site, with the roles and groups you chose. My courses shows anything they are already enrolled on, and Explore lists the courses they can enrol on.
Let people sign up themselves
Your learning site has a sign-up page at /register on your own address, such as learn.yourcompany.com/register. Anyone who finds it can register. They give a name, an email address and a password, and agree to the terms. Add any further questions you want to ask, such as department or job title, under Settings > Sign-up & security in the Custom Registration Fields card. Those answers can also drive group rules.
On the same page, the Registration card controls who gets in:
| Setting | What it does |
|---|---|
| Approve new users | No (the default): people who register are added as learners straight away. Yes: each sign-up waits for you on the Approvals page. |
| Whitelist domains | Appears when Approve new users is Yes. People whose email address ends with one of these domains, such as @yourcompany.com, skip approval. Separate several with commas. |
| Require Email Verification | Yes: people must click the link in a confirmation email. No: they can use the site without it. |
| Disable Manual Invites | Hides the Invites page. |
Changes only apply once you click Save changes.
If someone registers with an email address that already has a Continuum account elsewhere, Continuum emails that address to confirm before adding them to your team. It doesn't merge accounts silently.
Approve new sign-ups
With Approve new users switched on, people who register are told their account is pending approval. You review them under Manage > People > Approvals.
- Click View next to a request to see the details they entered.
- Click Approve to create their account and add them to your team as a learner, or Reject to remove the request.
The Approvals tab appears when Approve new users is on, or while there are requests waiting.
Pre-approve addresses
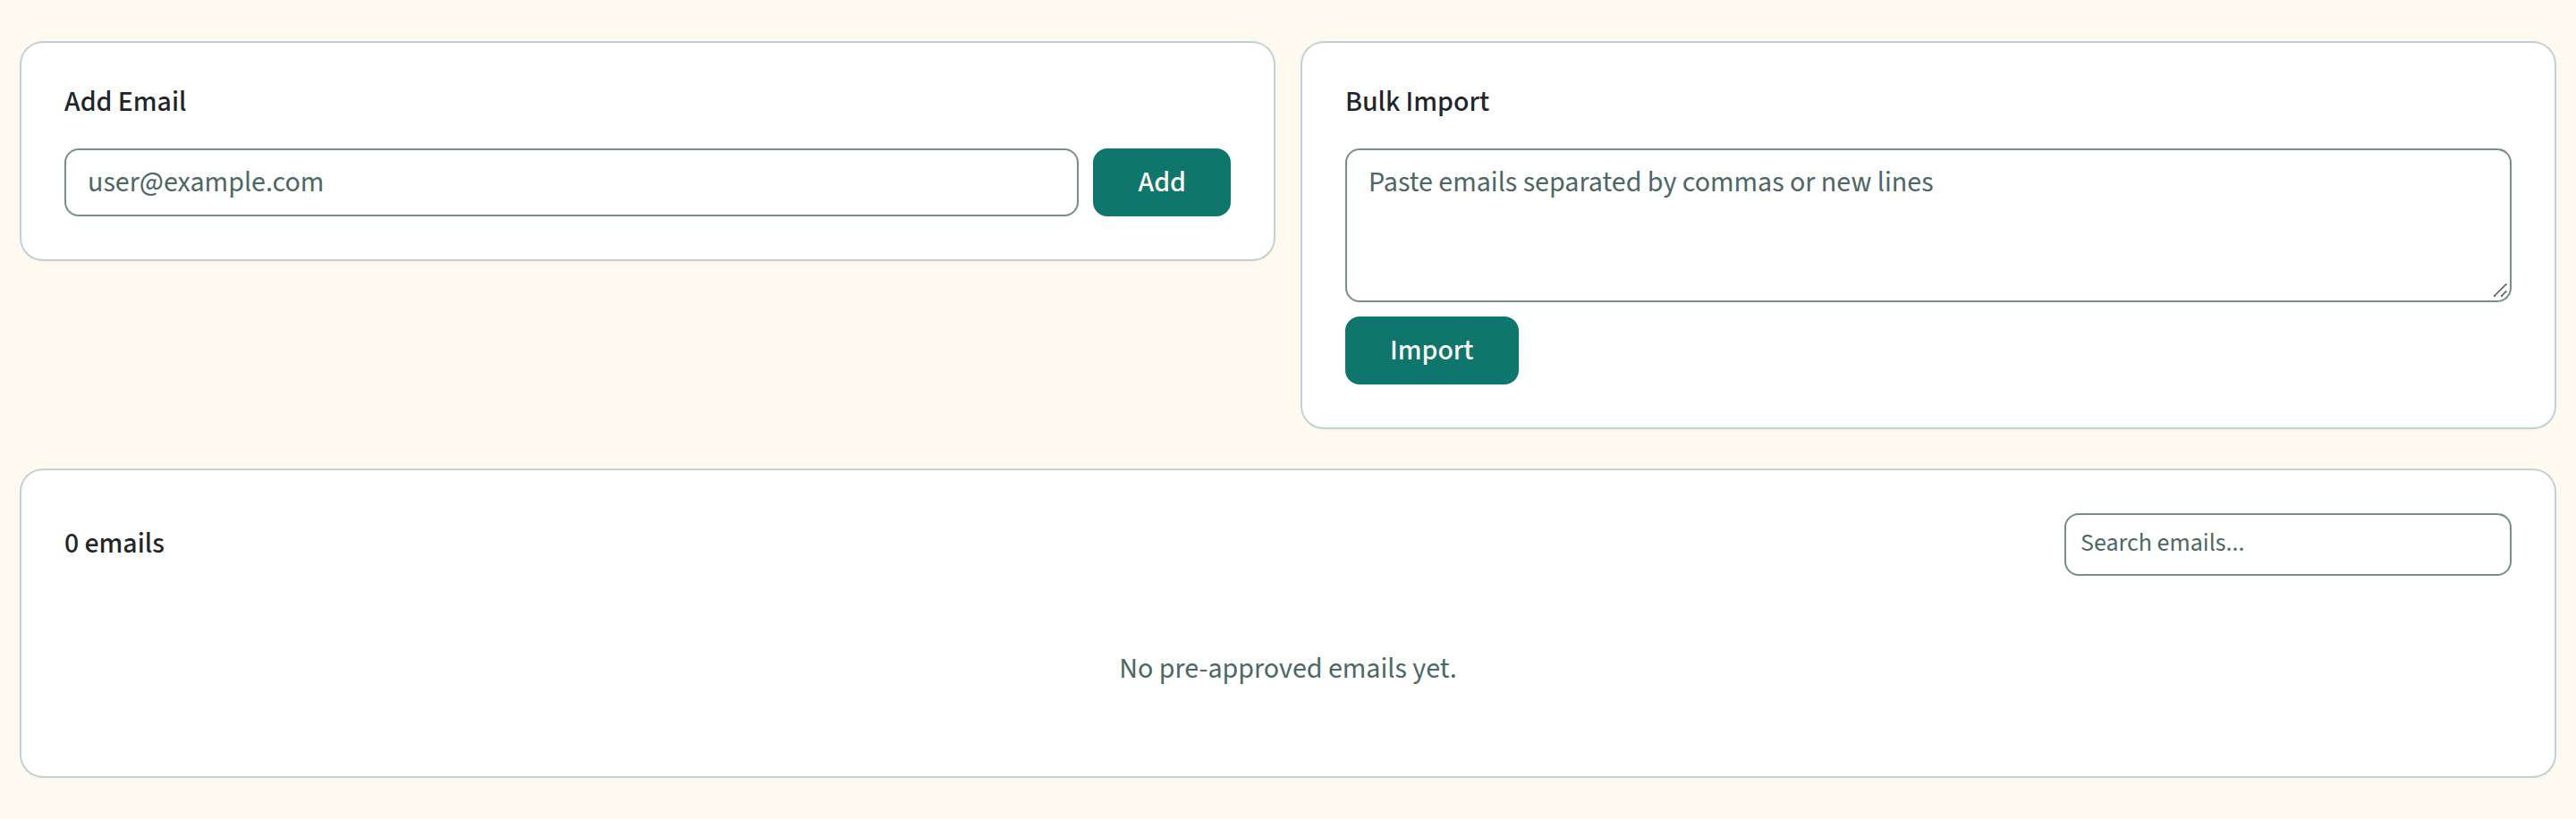
Under Manage > People > Pre-Approved you can list individual email addresses. Anyone who registers with one of them skips approval and doesn't need to verify their email address.
- To add one address, type it into Add Email and click Add.
- To add many, paste them into Bulk Import, separated by commas or new lines, and click Import.
- To take one off, click Remove beside it.
This is useful when you have a list of expected learners but don't want to invite each one. The Pre-Approved tab appears when Approve new users is on or the list already has addresses in it.
Let learners enrol, and control who is accepted
Once people are in your team, each course decides how they get onto it. Open the course in Create > Courses, click Settings and go to the Access & enrolment tab.
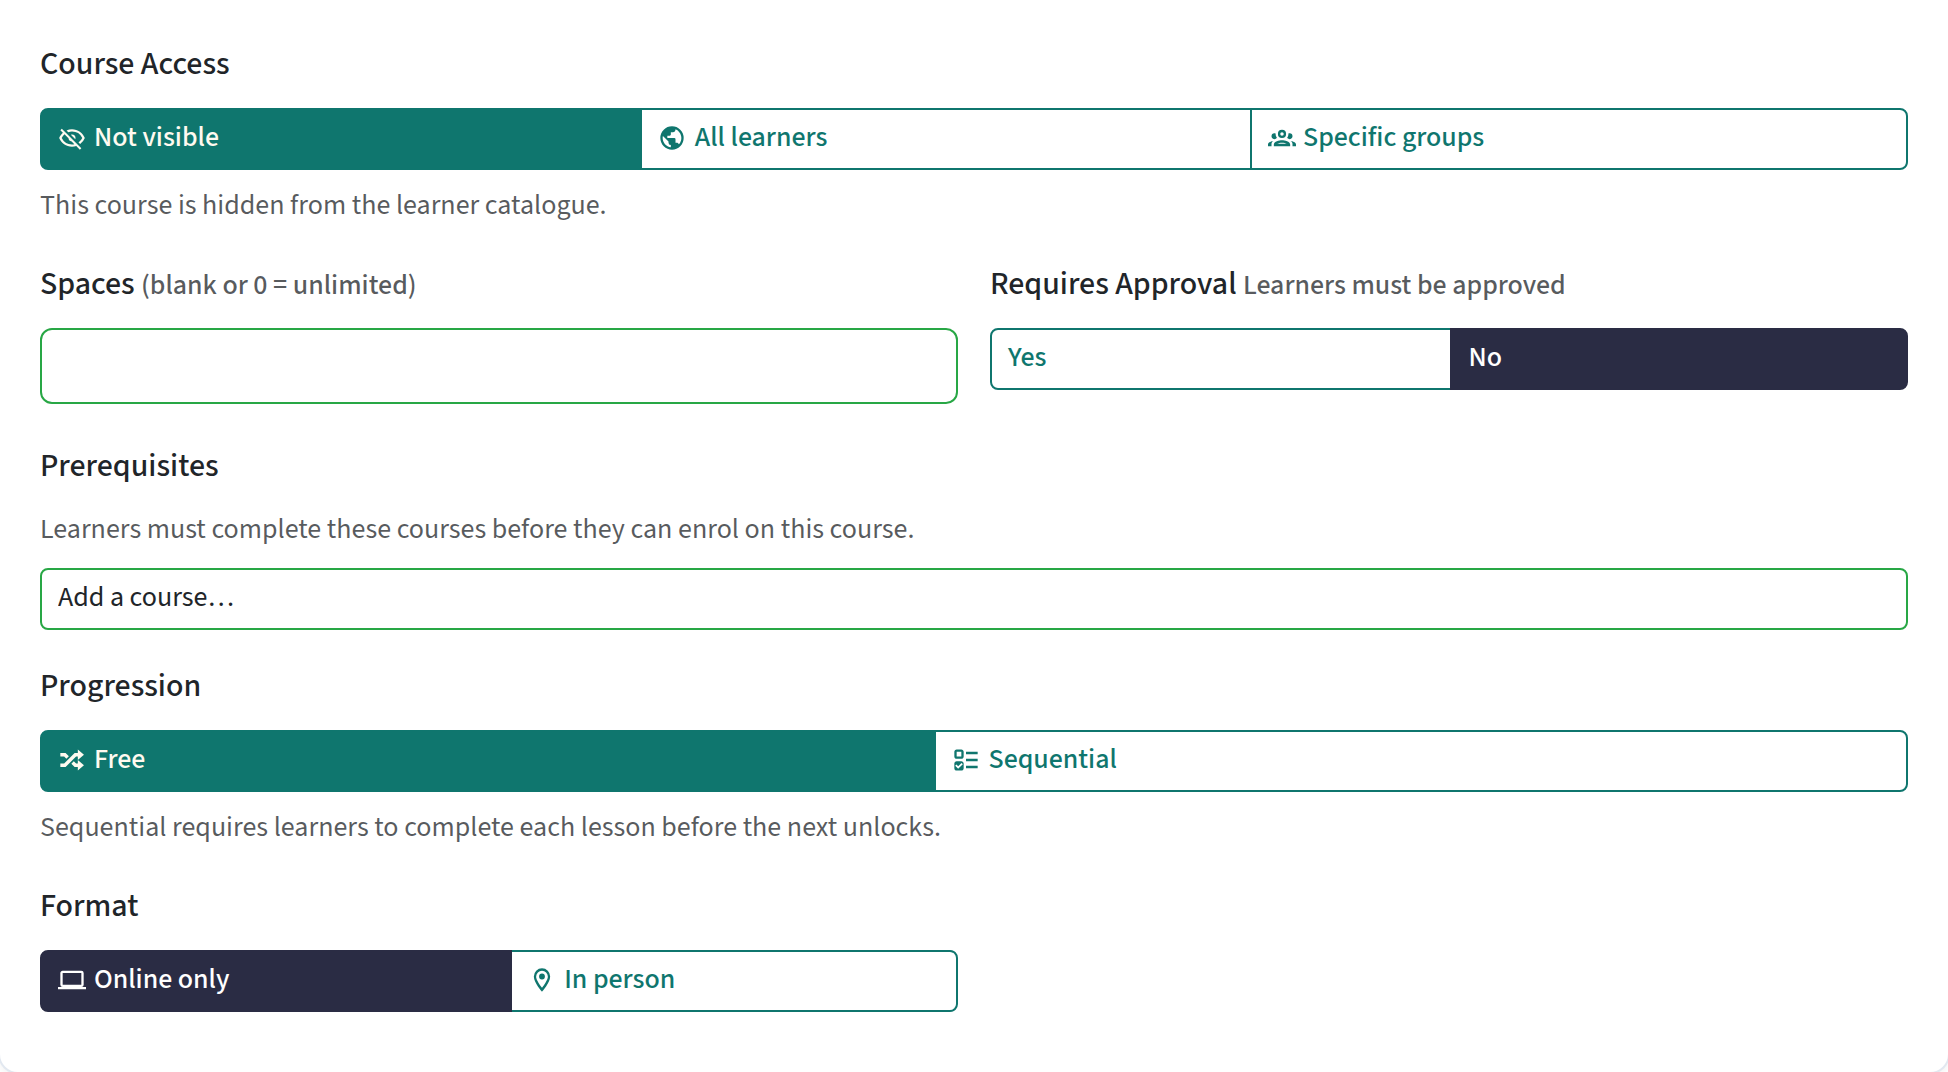
- Course Access chooses who can see the course. All learners lets everyone in your team find it and enrol themselves. Specific groups limits it to the groups you pick, either as Automatic Enrolment or as Optional Access. Not visible hides it. See Course settings.
- Spaces limits the number of places. Leave it blank, or enter 0, for unlimited.
- Requires Approval: Yes means a learner who tries to enrol becomes a request for you to approve, instead of being enrolled straight away.
On a course with approval or a full course, the learner's button says Apply instead of Enrol. A course that costs money goes to the checkout instead. Courses with prerequisites stay locked until the learner has finished them.
Approve enrolment requests
Requests are under Manage > People > Enrolment Requests. Each row shows the person, the course (with how full it is), and the date.
- Click View to see the person's details.
- Click Approve to enrol them, or Reject to turn them down. The learner is emailed if you reject.
The Enrolment Requests tab appears when any course requires approval, or while requests are waiting.
Places and the waiting list
When a course has a limit and every place is taken, anyone who tries to enrol is put on a waiting list instead, whether or not the course needs approval. They see You are on the waiting list in the catalogue.
Places taken include people enrolled by a group. Nobody is moved off the waiting list automatically. When a place frees up, open Manage > People > Waiting List and approve the person in the same way as a request. The View button only shows for a course that has a free place. The Waiting List page lists people waiting for courses that have a start date in the future.
Enrol people yourself
- Go to Manage > Courses and open the course.
- Open the Learners tab and click Enrol learners.
- Search for people by name or email, click them to move them to the right-hand list, and click Enrol learners.
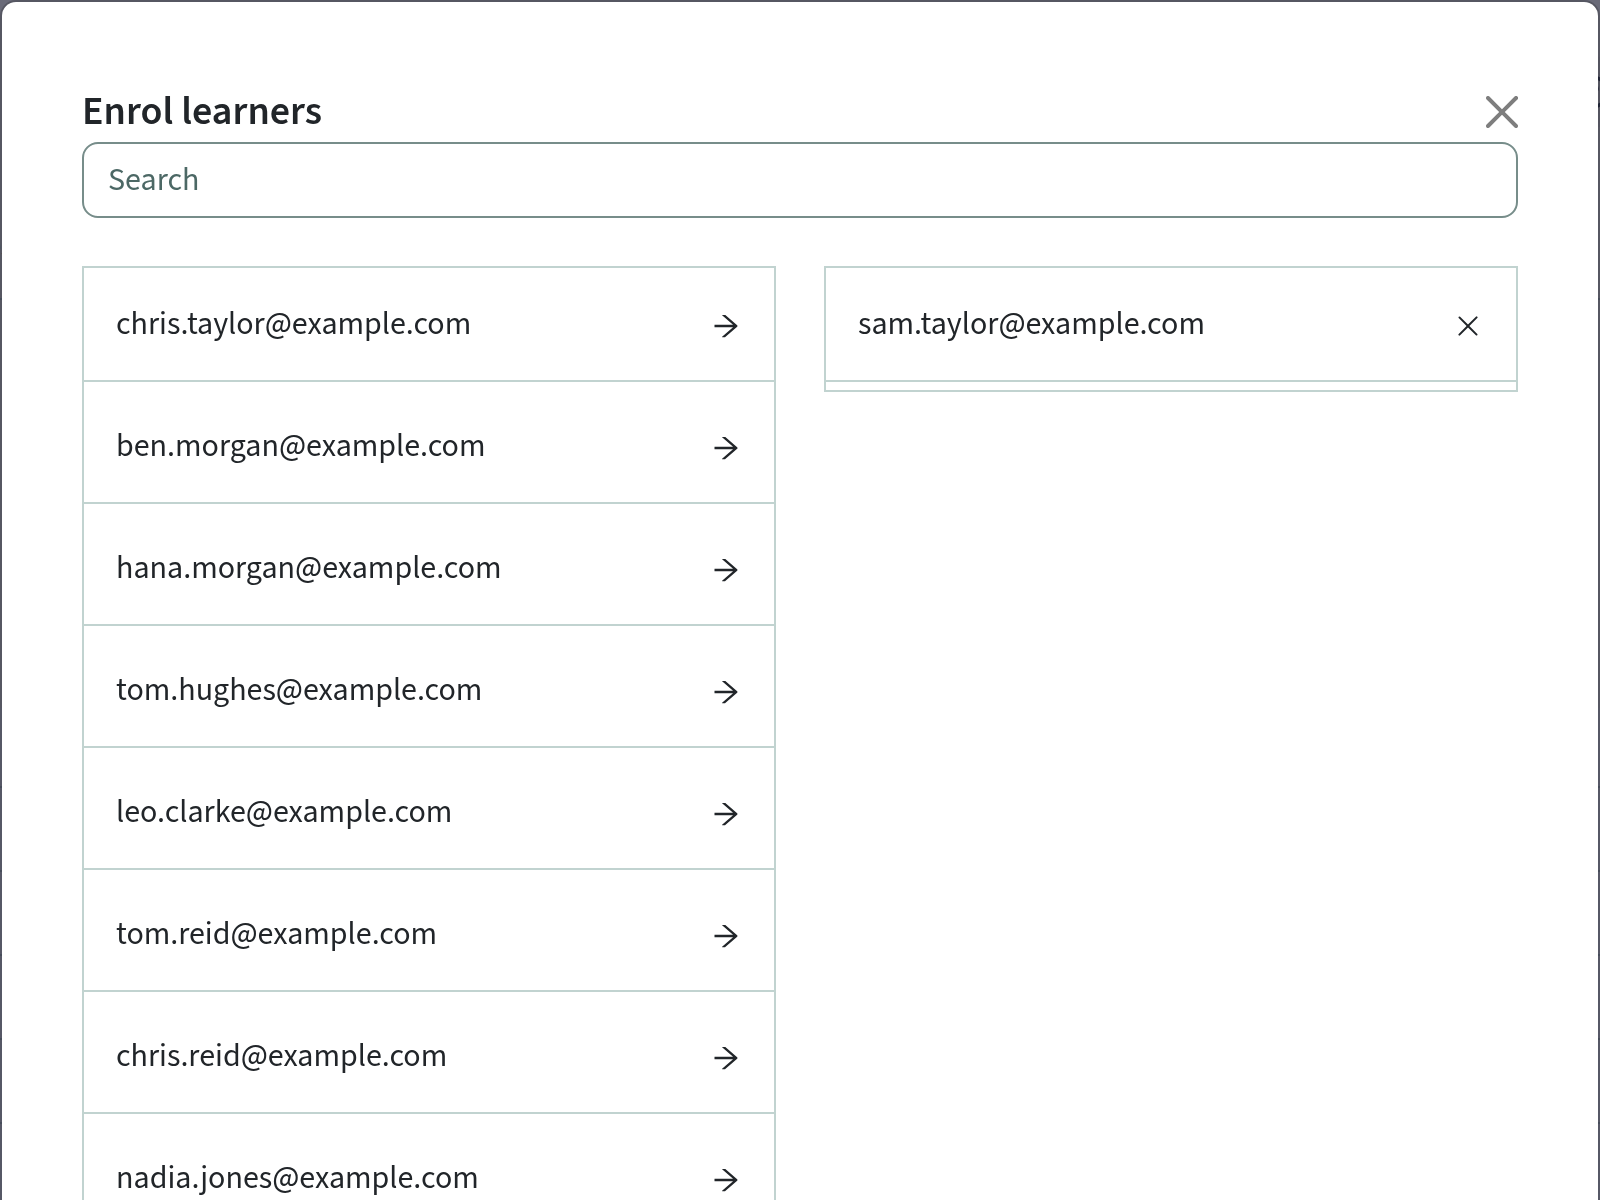
You can only enrol people who are already in your team, so invite them first if they aren't. Enrolling yourself doesn't use the approval step, and it isn't stopped by a full course. To take someone off, click Remove beside them on the same tab.
Enrol a whole group
If the same people need the same courses, use a group.
- Create the group under Manage > People > Groups and add its members.
- Assign courses to it as automatic or optional, either on the group's Courses tab or on the course's Groups tab.
Everyone in the group, now and in future, is enrolled on the automatic courses. See Groups and cohorts for the full steps.
Programmes
A programme with Explicit enrolment has its own Learners tab, with its own add and Import from CSV options. See Programmes.
Frequently asked questions
I invited someone but they can't see any courses. Why?
An invitation puts someone in your team, not on a course. Enrol them on a course, or invite them into a group that has automatic courses. Check, too, that the course's Course Access isn't set to Not visible.
The invitation link doesn't work any more.
Either you deleted the invitation, or you invited the same address again, which replaces the earlier link. Use the newest email, or open Manage > People > Invites and click Copy Link.
Can I see who has accepted an invitation?
The Invites page lists only invitations that haven't been accepted yet. Once someone accepts, they move to Manage > People > Users.
How do I stop strangers signing up?
Switch Approve new users on under Settings > Sign-up & security, then use Whitelist domains and Pre-Approved for the people you do expect. Everyone else waits on the Approvals page.
What is the difference between Approvals and Enrolment Requests?
Approvals decide who can join your team at all. Enrolment Requests decide who can join one particular course, and need Requires Approval switched on for that course.
Can learners enrol themselves on a paid course?
They are taken to the cart and checkout instead. See Selling.
What does a learner see when I enrol them?
The course appears in their My courses. For a group, the course appears the same way. They don't need to do anything.
How do I email people who haven't started?
Use a cohort for the list and Manage > Messages > Notifications to send to it. See Groups and cohorts.